Digitally Driven All-on-4: Full-Arch Rehabilitation Using Guided Surgery and Photogrammetry
This case presents a 53-year-old female patient with severe esthetic and functional impairment due to advanced periodontal disease and extensive dental infections. The patient reported progressive tooth mobility, difficulty in chewing, and dissatisfaction with her smile, affecting both her oral function and quality of life.
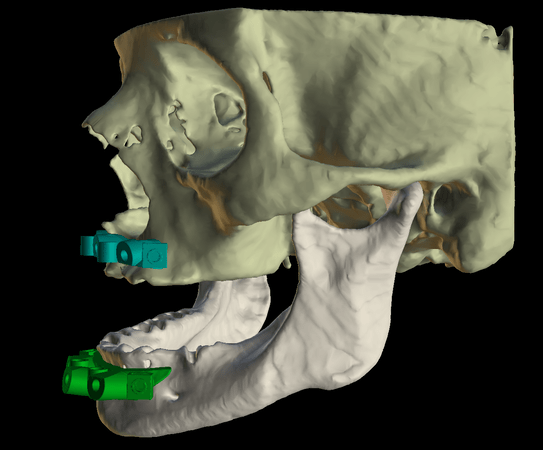
Clinical examination and imaging revealed generalized bone loss, multiple infected roots, and terminal dentition in both arches, indicating the need for a bimaxillary full-arch rehabilitation. Given the extent of periodontal destruction and the compromised prognosis of the remaining teeth, a fully digital All-on-4 treatment approach was planned to optimize bone utilization, minimize invasiveness, and provide immediate function.
Clinical Findings
Maxilla
- Generalized chronic periodontal disease with severe bone loss.
- Remaining teeth (11, 21, and 23) presented apical infections and significant bone resorption.
Mandible
- Teeth 41, 31, 32, 33, and 34 presented grade III mobility.
- The remaining teeth exhibited grade II mobility.
- Teeth 37, 46, and 47 had infected roots with class IV furcation involvement.
Objectives
Full-arch rehabilitation with immediate function
- Restore esthetics, function, and patient confidence through a predictable and efficient treatment approach.
Complete removal of compromised dentition and infected tissues
- Eliminate periodontal disease and prevent further bone resorption by extracting all remaining non-restorable teeth.
Maximize bone utilization through the All-on-4 concept
- Optimize implant positioning to take advantage of available bone, reducing the need for extensive grafting procedures.
Implement a fully digital workflow for enhanced precision and efficiency
- Utilize digital planning, 3D-printed surgical guides, and photogrammetry to improve accuracy and treatment predictability.
Achieve an optimal immediate provisionalization
- Securely place a functional and esthetic temporary prosthesis on the day of surgery.
Ensure long-term prosthetic success with digital impression techniques
- Use photogrammetry to enhance the accuracy of final implant positioning and reduce errors in definitive prosthesis fabrication.
Minimize surgical and prosthetic complications
- Enhance patient safety and comfort by reducing chair time and postoperative morbidity through a guided, minimally invasive approach.
Evaluation & Diagnosis
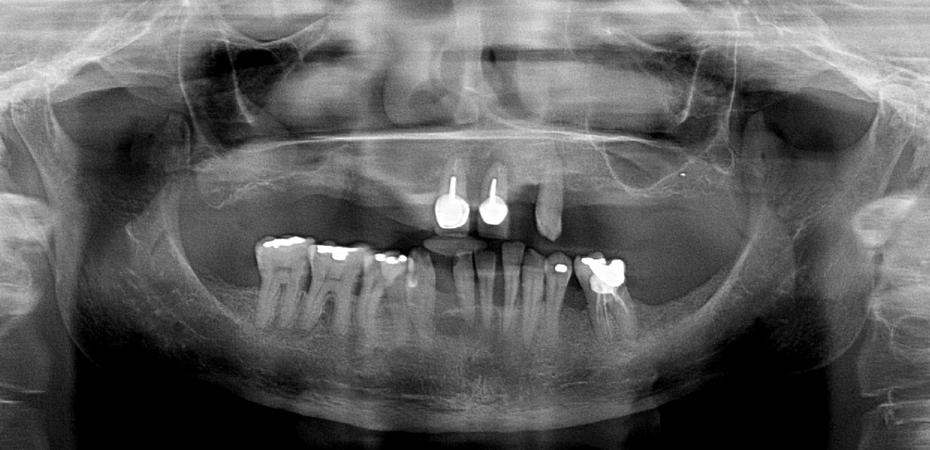
Generalized bone loss, multiple infected roots, and terminal dentition in both arches.
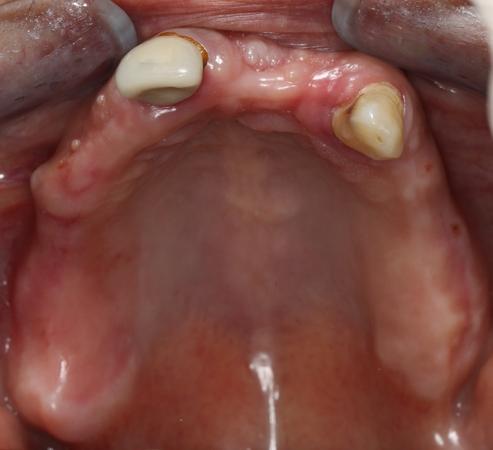
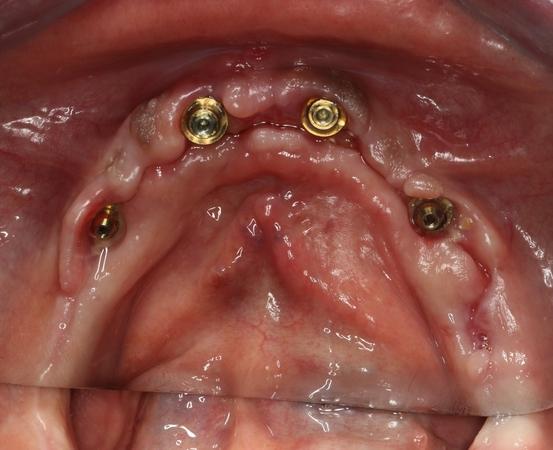
Intra-oral maxillary occlusal view
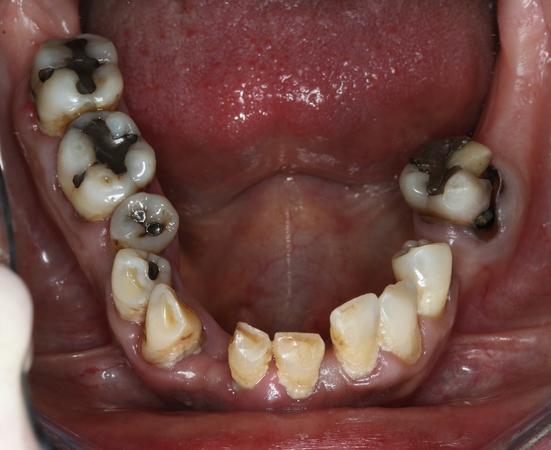
Intra-oral mandible occlusal view
Progress & Completion
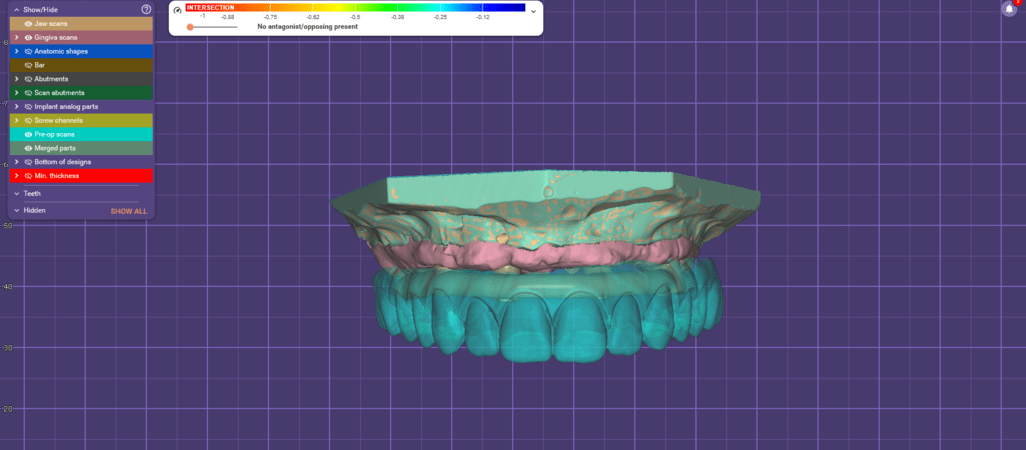
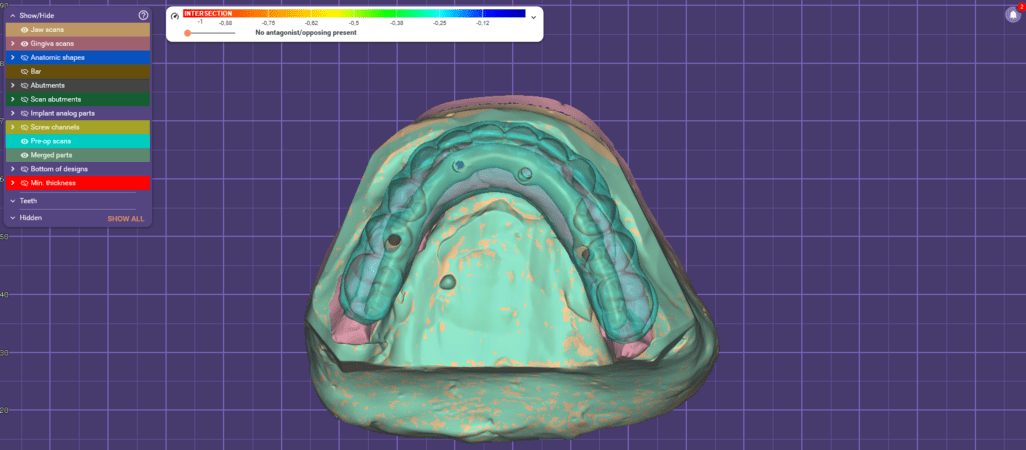
Digital base guide's design
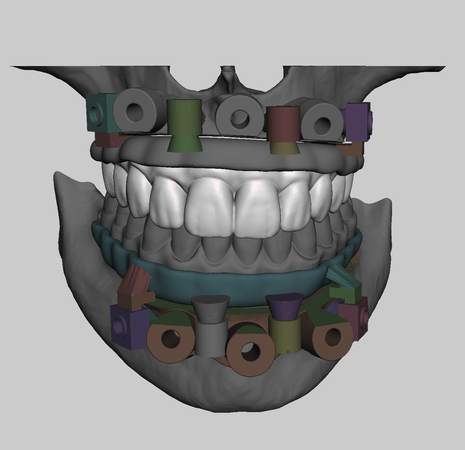
Meshmixer guides and teeth design
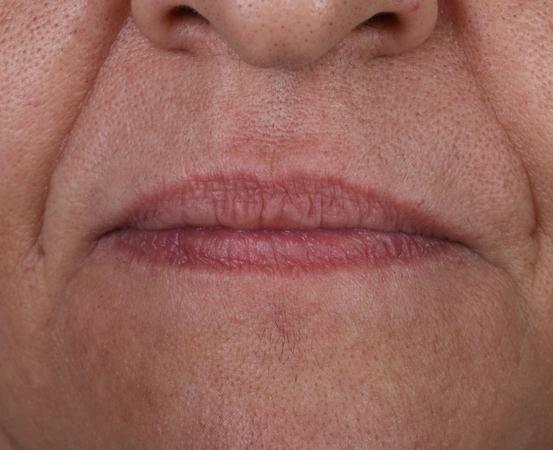
Resting position after surgery
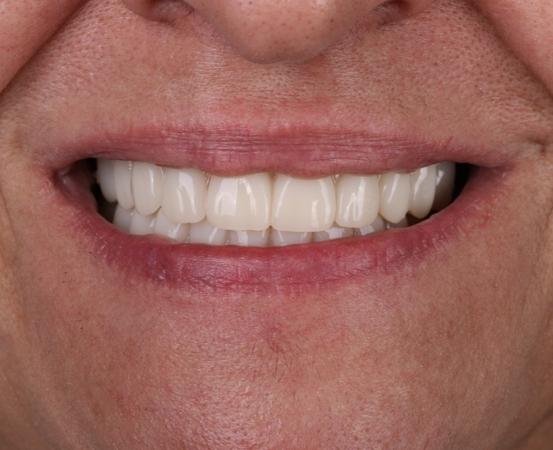
Provisional restorative procedure photos- Smile
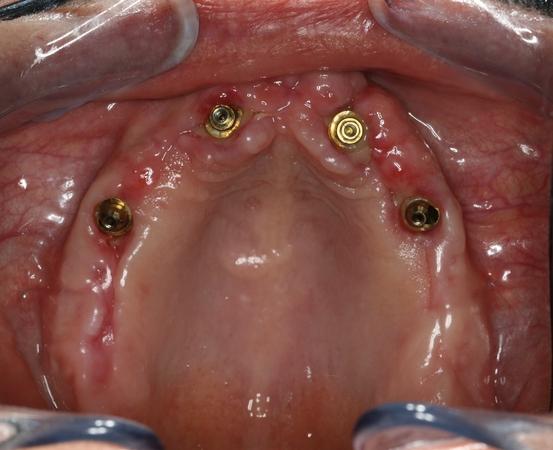
Maxilla post-op 10 days after surgery
Mandible post-op 10 days after surgery
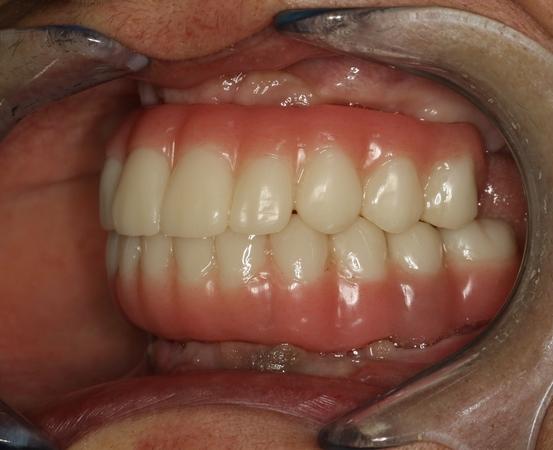
Temporary bridges left bite
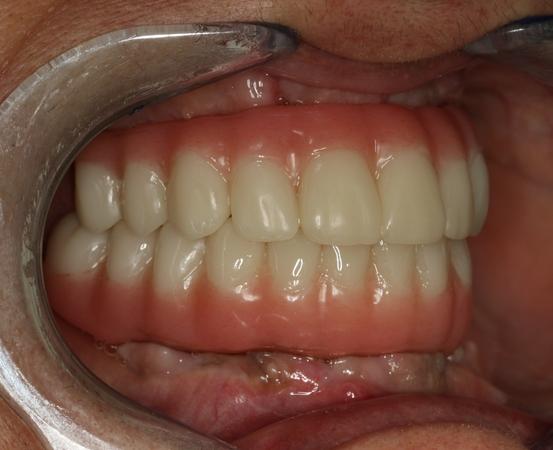
Temporary bridges right bite

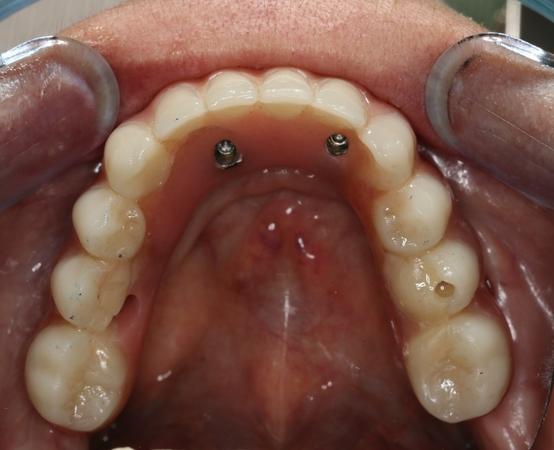
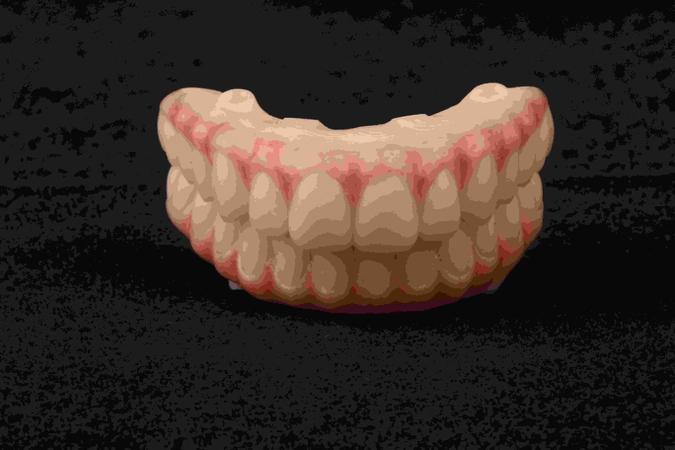
Upper Temporary bridge occlusal view- Maxilla
Lower Temporary bridge occlusal view
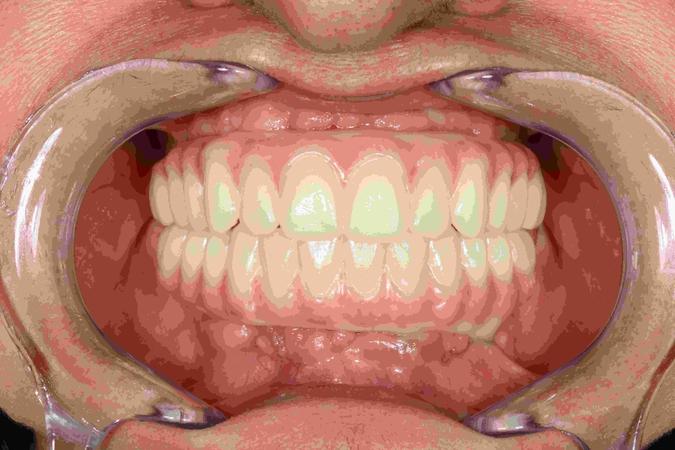
Temporary bridges front bite
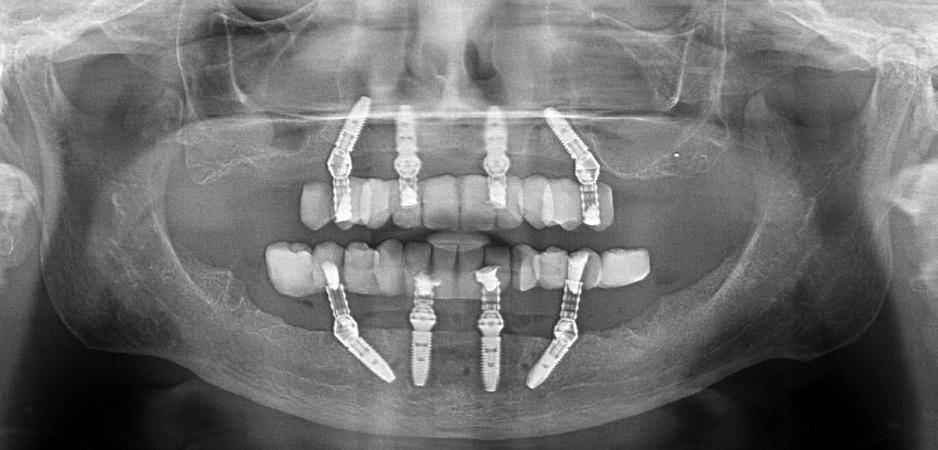
Post-op 10 days OPG
An orthopantomography (Kodak 800C) and a computerized tomography (Kavo OP 3D Vision) scan were performed for the baseline data collection. In addition, an intra-oral scanning (Trios, 3 shape A/S, Copenhagen, Denmark) was also performed.
Based on the collected data, the interim prosthesis was digitally designed using Exocad (DentalCAD 3.1 Rijeka, Exocad GmbH, Darmstadt, Germany). Utilizing the reverse planning method, bone reduction and dental implant placement were digitally planned with Bluesky Plan (V4.9.4 64-bit, BlueSkyBio, Libertyville, IL, USA).
For the design of the fixation base guides, surgical guides, prosthetic guides, and occlusion guide, Meshmixer (V3.1, Autodesk, San Francisco, CA, USA) was used. All components were then 3D printed using the SprintRay Pro 2 3D printer (SprintRay Inc., Los Angeles, CA, USA).
- The interim prosthetics were printed using SprintRay Temporary Crown & Teeth resin.
- All 3D surgical guides were printed using SprintRay Surgical Guide 3 resin.
Finally, the artificial gingiva of the prosthesis was characterized using Optiglaze Color pigment (GC International AG, Zurich, Switzerland).
Considering the All-on-4 surgical protocol, the intervention was performed using local anesthesia with articaine chlorhydrate with epinephrine 1:100,000 (Scandinibsa 2%, Inibsa Laboratory, Barcelona, Spain). The procedure was done first in the Maxilla and then in the Mandible. The flap was elevated to facilitate the precise insertion and adaptation of the base guide to the buccal cortical bone. This guide put into position with the help of the Fixation Guide was secured using 2.2 mm drills and guide fixation pins (BlueSkyBio, Libertyville, IL, USA). It remained fixed throughout the entire procedure, as it guided the bone reduction and the correct positioning of the subsequent guides.
The next step involved bone regularization and reduction to create a stable and flat bone surface. This was performed using a Piezomed SA-320 unit (W&H, Burmoos, Austria), a Rongeur Beyer (Hu-Friedy, Chicago, IL, USA), and a round handpiece bur (Axis Dental, Crissier, Switzerland).
Once bone regularization was completed, the implant guide was stacked over the base guide, enabling the guided placement of implants in accordance with the preoperative planning.
The treatment followed the All-on-4 concept and 4 implants and 4 abutments from Nobel Biocare (Nobel Biocare AB, Gothenburg, Sweden) were placed in each jaw as follows:
Maxilla:
#15
- Nobel Parallel CC Ti Ultra NP 3.75x11.5mm (+35N)
- 30° Multi-Unit Abutment Xeal CC NP 4.5mm (20N)
#12
- Nobel Parallel CC Ti Ultra NP 3.75x10mm (+35N)
- Multi-Unit Abutment Xeal CC NP 2.5mm (25N)
#22
- Nobel Parallel CC Ti Ultra NP 3.75x10mm (+35N)
- Multi-Unit Abutment Xeal CC NP 2.5mm (25N)
#25
- Nobel Parallel CC Ti Ultra NP 3.75x11.5mm (+35N)
- 30° Multi-Unit Abutment Xeal CC NP 4.5mm (20N)
Mandible:
#35
- Nobel Parallel CC Ti Ultra NP 3.75x11.5mm (+50N)
- 30° Multi-Unit Abutment Xeal CC NP 4.5mm (20N)
#32
- Nobel Parallel CC Ti Ultra NP 3.75x11.5mm (+50N)
- Multi-Unit Abutment Xeal CC NP 2.5mm (25N)
#42
- Nobel Parallel CC Ti Ultra NP 3.75x10mm (+50N)
- Multi-Unit Abutment Xeal CC NP 2.5mm (25N)
#45
- Nobel Parallel CC Ti Ultra NP 3.75x11.5mm (+50N)
- 30° Multi-Unit Abutment Xeal CC NP 4.5mm (20N)
After implant insertion on the upper jaw, the implant guide was removed, and the prosthetic guide was stacked on top of the base guide. This guide allowed for relining the temporary prosthesis in the previously planned position. The base guide was then removed, and the flap was sutured using non-resorbable sutures (3-0, B Braun Silkam, Aesculap Inc., Center Valley, PA, USA). The prosthesis was relined in the mouth using a pink acrylic-resin (Unifast, GC Corporation, Tokyo, Japan). Following the relining procedure, the prosthesis was finished chairside without laboratorial support.
For the mandible we follow the same procedure as the maxilla, but instead of using the prosthetic guide for the relining the temporary prosthesis, we used the occlusion guide which provided not only the planned occlusion but also the correct stop for the planned vertical dimension, when used against the lower base guide while the patient closed the mouth.
Upper maxillary surgery
Mandible surgery
Final restorative procedure
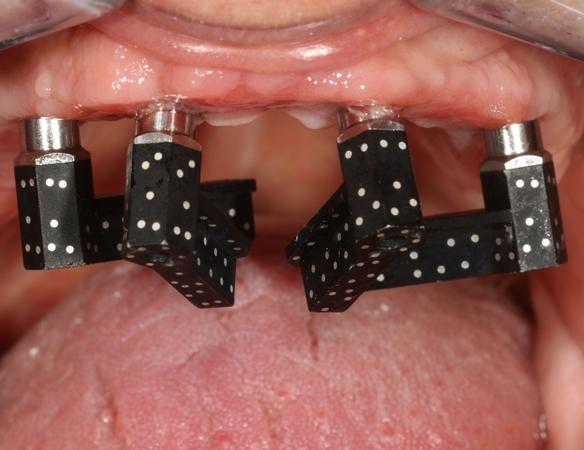
Photogrammetry scan flags on upper jaw
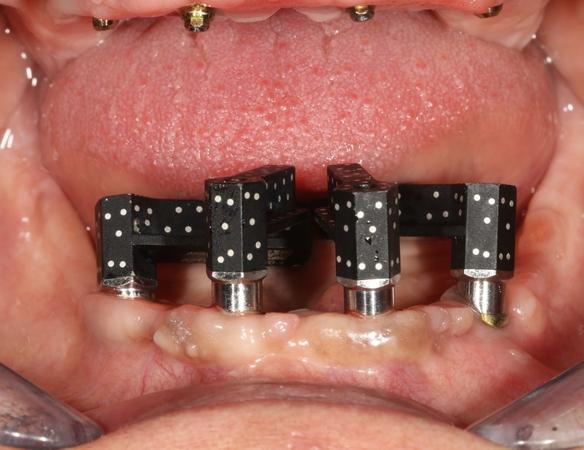
Photogrammetry scan flags on lower jaw
Upper Titanium framework design on exocad
Printed Try-In for Final Bridge
Intra-oral Printed Try-in for Final Bridge
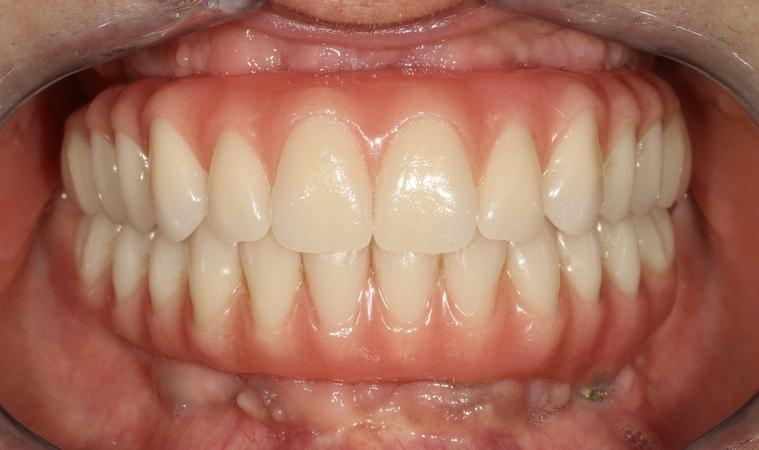
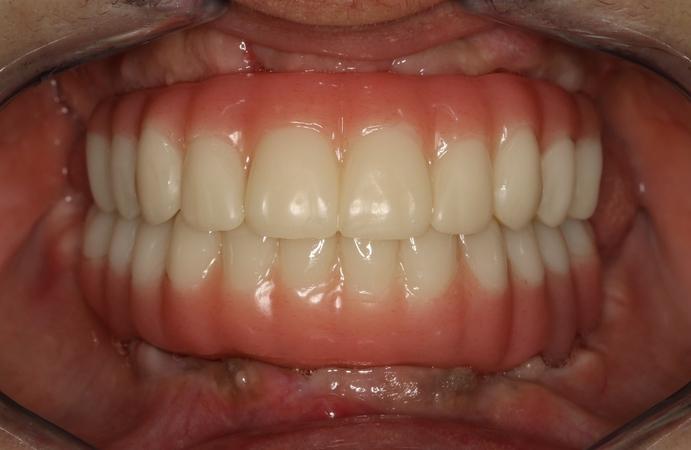
Final bridges front bite
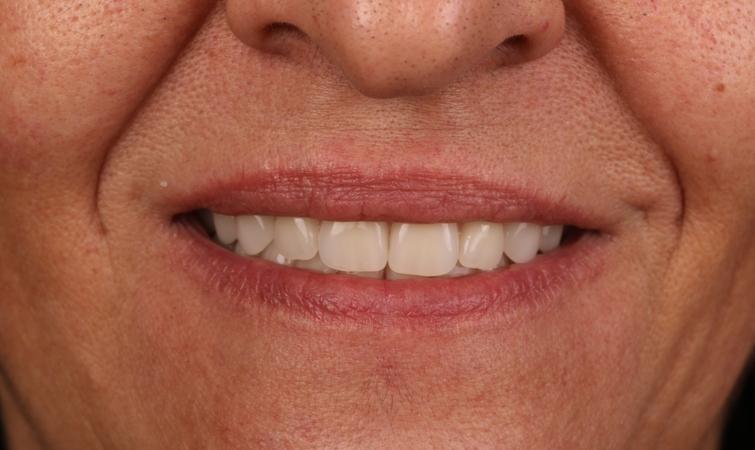
Final Smile
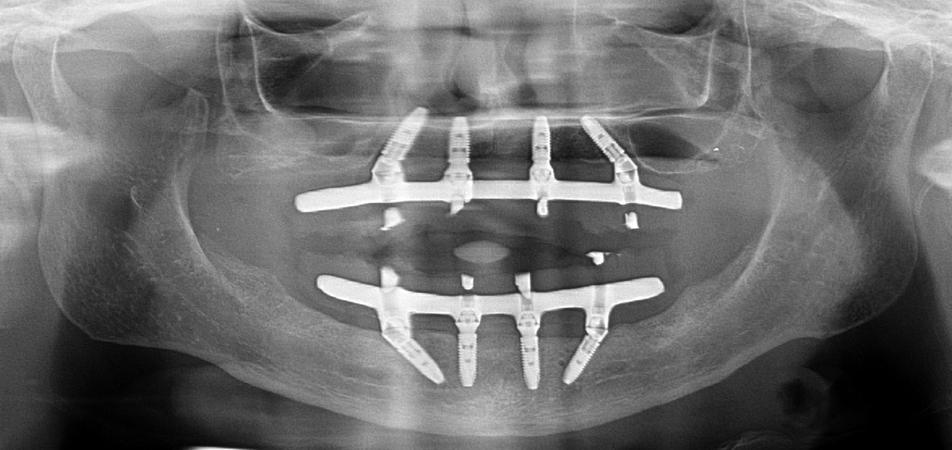
Final OPG 1 year after surgery
Control appointments were performed at were evaluated at 10 days, 2 months, 4 months, and 6 months post-surgically. After 6 months, scanning and photogrammetry using Aoral Scan Elite (Shining 3D Tech Company, San Francisco, CA, USA) was performed and a resin try-in was digitally designed, printed and tested on patient’s mouth. Based on this try-in, the titanium framework (NobelProcera titanium framework; Nobel Biocare AB) was designed and produced. Using the printed model and a silicone matrix the prosthetic teeth and artificial gum were produced using injected acrylic resin Vertys Monomassa for prosthetic teeth and artificial gum (VertySystem, Vicenza, Italy).
A control appointment was conducted one month after prosthesis delivery, followed by a one-year post-surgery follow-up visit. Throughout the functional osseointegration period and up to the present moment, all implants and prostheses remained in function.
Radiographic evaluation revealed no signs of passive misfit in the prostheses. Additionally, no biological complications were observed during the follow-up period, and there was a complete absence of mechanical complications.
This case demonstrates the successful implementation of a fully digital workflow for bimaxillary full-arch rehabilitation using the All-on-4 concept. The integration of 3D-printed surgical guides, guided implant placement, and photogrammetry resulted in a highly predictable, efficient, and minimally invasive approach. The digital workflow ensured precise bone reduction, optimal implant positioning, and immediate prosthetic rehabilitation, leading to excellent clinical and functional outcomes. The absence of biological and mechanical complications throughout the follow-up period further validates the effectiveness and reliability of this approach.
Patient Expectations
Questions
Ask a question
Hello dear’s colleagues. What a wonderful job. Congrats. Why did you prefer Verty Sistem? What is the the point? Best regards.
Extrair tudo na mandíbula !!